Pleasing separation
September 26, 2011This past week a student inquired about adding a very narrow border to her quilt to visually separate the quilt center from a wider border. Piecing in a 1/4″ border can be tricky and so I had some alternative ideas to share:
If you’ve ever done counted cross stitch, you are no doubt aware that once the crosses are completed, most patterns have the different color areas outlined with a line of black backstitches. Even though this line is very narrow, it adds a lot of interest and definition. Sometimes this is a good option for separating borders…and even bindings.
One simple way to do this is to sandwich piping (purchased or homemade) into the seam between the quilt center and the border.
Another idea that has been very popular recently is to fold a 1″ strip of contrasting fabric in half lengthwise, wrong sides together, and slip this into the seam. I like to refer to this as a flange and it can add a lot of punch for a small amount of fabric and effort.
One additional idea is really simple and can be done after the quilt is finished and bound – couch a piece of yarn or cording on top of the seam! Couching simply means to lay the yarn/cording in the “ditch” of the seam and stitch on top of it with a zig-zag or serpentine stitch. It can be done in invisible thread or something decorative.
And now for an example to show how helpful this effect can be:
I made the following quilt for a “Tea” challenge through the Milwaukee Art Quilters. All of the fabrics were dyed in tea and I quilted the different areas as a sampler of quilting designs.

For some reason I bound the quilt in a similar color fabric to the rest of the quilt and it seemed to look like the quilt never ended when hung on a light colored wall. So I couched a brown chenille yarn along the binding and was very pleased with the results.

That simple addition made the quilt a success in my mind :-).
On a completely different note, there is still room in many of my local classes at MATC in Watertown and WCTC in Waukesha. Please scroll down to my August 4th post and simply click to register on line or call the number next to the class to register by phone.
And something new: I will be teaching the following quilting classes in Hustisford, WI on Saturdays this Fall.

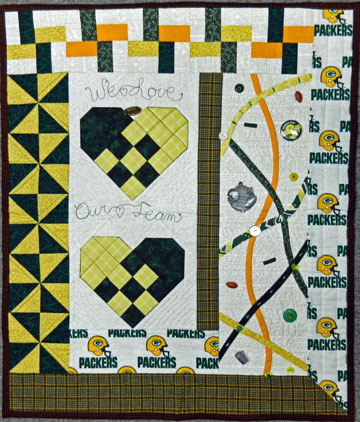
Beginning Fast Patch – Oct 15th & Oct 29th 8:30am -1:00pm: Learn many quick and fun quilting techniques while making this wall hanging. It may be made in any color scheme you like (Packers fabric is optional :-).

Paper Pieced Project – Nov. 19th – 9:00AM – 1:00PM. Learn to piece “Flying Geese” and “Square in a Square” blocks on a paper foundation while creating this lovely small wallhanging. It’s a fun technique that yeilds accurate results (once again, fabric and color themes are up to you :-).
For more information, or to sign up, contact Cindy Fitzsimmons at: ce@hustisford.k12.wi.us
Congratulations on your 100th blog! You’re doing such a super job and I’m always inspired by your beautiful work! Blessings!
I actually prefer quilts with little or no borders. Maybe it’s because I prefer “modern” quilts versus traditional quilts? I’m intrigued by your “flange” border but I can’t picture either the steps to installing one or how it would look finished. Could you suggest some resources for more visuals?
Thanks,
Natalie
Hi Natalie, Thanks for the inspiration for next week’s topic. I’ll do a “step by step” in pictures for the flange :-).
looking forward to both of your classes in Hustisford
What a wounderful idea of using the yarn. I would have never thought of that. A much better idea than taking off the binding!